Goal
Create an experiment, assign hardware, configure EIS controls, and start sampling.
Before you start
-
You are an Admin or Experimenter (Viewers cannot start or change experiments).
-
Your Probe is Online in the Probes tab.
-
Your Probe is assigned to a Facility and Test Station.
-
If using CMUs or a Switch: confirm they are connected and you know the DUT channel(s).
1) Go to the Experiments page
-
In the left sidebar, click Experiments.
What you should see: a list of previous experiments.
2) Create a new experiment
-
In the top right, click Add (plus icon).
-
A new setup window opens.
3) Select and assign hardware
3A) Select Facility and Test Station
-
Select Facility: choose where your equipment is located.
-
Select Test Station: choose the specific station under that Facility.
What you should see
-
Your Probe appears under the Probe column.
-
Any connected CMUs appear under the Switch, CMU, and Channel column (if applicable).
3B) If you are using CMUs
-
Select the CMU(s) you are using.
-
Select the CMU channel(s) connected to your device under test.
-
Scroll down and click Save Hardware.
What you should see: the selected hardware is assigned to the experiment.
If you get stuck
-
If your Probe is missing, confirm it is Online and assigned to a Facility and Test Station.
-
If CMUs are missing, confirm cabling and check the CMUs or Switches tab.
4) Add tags (recommended)
Tags help you find experiments later and help Pulsenics support interpret your data.
Recommended tag pattern
-
Client or project
-
Facility + Test Station
-
DUT identifier
-
Probe serial
-
Campaign label (baseline, commissioning, etc.)
How to add
-
Review existing tags.
-
To create a new tag, type in the tag field and click Add.
-
Click the tag, then click Add to assign it to the experiment.
5) Configure controls (EIS settings)
-
Click Configure Controls.
-
Confirm you are editing the correct Probe.
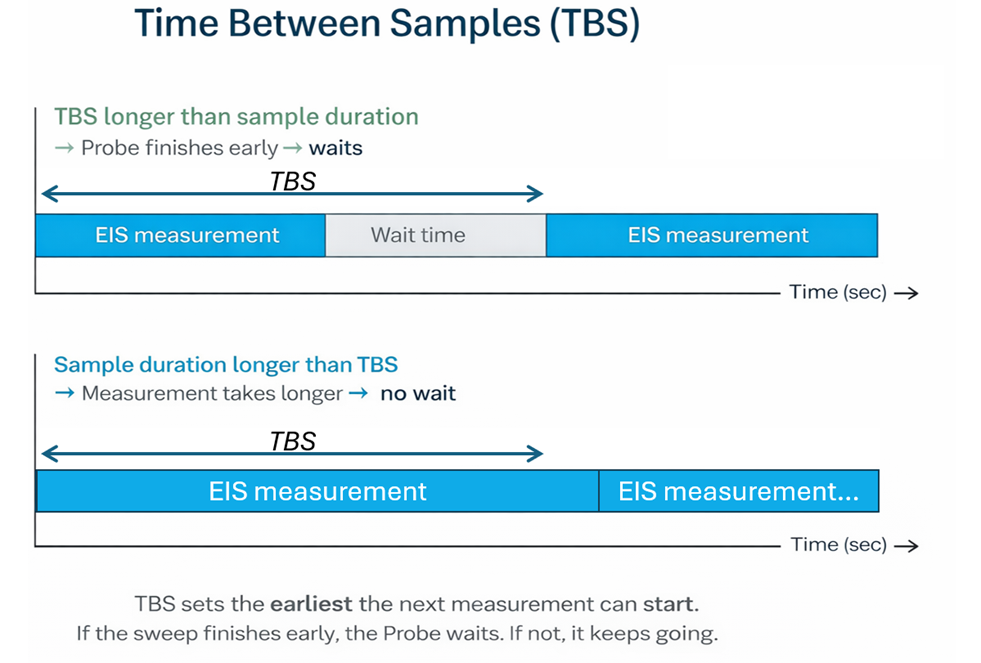
Set time between samples
-
Enter time between samples (example: 30 seconds).
-
If time between samples is longer than measurement duration, the next measurement waits.
-
If time between samples is shorter than measurement duration, the next measurement starts immediately.
Choose EIS mode
-
Select Galvanostatic or Potentiostatic.
-
Recommended starter: Galvanostatic until you understand your system.
Set frequency range and amplitude
-
Set min and max frequency (example: 0.1 Hz to 10,000 Hz).
-
Set amplitude (example: 1 A).
Choose single sine or multi sine
-
Simultaneous frequencies = 1 means single sine.
-
Total frequencies: up to 120 across the range.
-
Multi sine: increase simultaneous frequencies (up to 30).
Use the time domain preview to confirm what will be applied.
-
Scroll down and click Save.
What you should see: the saved control values appear in the controls summary.
6) Start the experiment
-
Click Start Experiment.
-
Enter an experiment name.
Optional auto stop
-
End date, or
-
Max number of samples
If left blank, the experiment continues until you stop it manually.
-
Click Start Experiment to begin sampling.
Verify success
-
Confirm samples begin arriving on the expected cadence (based on time between samples).